Friday, 29 January 2016

Tuesday, 26 January 2016

The Winter Dress


Here's another piece from the Fall Fashion Show. I really enjoyed making this one. I don't think I have many progress shots, but I do plan on making another one, so this time maybe I will remember to take more!


And the back:

This is another mixed-fabric piece. Wool top in the front, and jersey in the back. Wool tweed skirt, and new white cotton for the underskirt. I really enjoyed making this one!  It sold to a lovely woman I see every year at some craft shows I do in Kingston and I hope she is enjoying it! I admit that I likely would have kept this one for myself as well if teal was my colour. Happy sewing everybody!


Tuesday, 12 January 2016

The Sassy Romper


This one is another Fall Fashion Show piece and another piece of my wardrobe in heavy rotation. I lurve it! (lurve being the word we use around here when it is more than love!)

It began a long time ago, in a galaxy exactly like this one...as a skirt

Cute and like many vintage skirts, has a tiny waist!
I bought this wool beauty many years ago and did not know what to do with it. I love the colour and stripes but even if I adjusted the waist to make it fit, I couldn't see myself wearing it. And so I held onto it for years until I found the perfect project (much like a lot of my stash is waiting around for the right project).

And thus the romper came into my imagination...

Skirt + old sweatshirt
It's hard to tell from this picture but the skirt is a maroon colour, not unlike the sweatshirt. But I had an idea, and so the cutting began.


I'm not used to taking any progress shots, so I'm lucky I did even this many!  I basically cut away from the top of the skirt. Then I put it on and while in front of the mirror, I made modifications to the cuts. These cuts would be where I would add the sweatshirt fabric. I often pinned the cut skirt to my t-shirt so I could get a good idea of where the hem would fall and how it would look. 

Those brown things are the pockets - the interior that would soon be matched to the other pocket halves, then turned to the inside of the garment.

Contemplating  my garden, and how I can get someone to maintain it for me.

That large button on the front is for looks and it's a vintage one from my stash. It's still pinned on. Have you ever heard the expression, "The cobbler's children have no shoes"? That's what's going on here. I sew things and finish them when they are for sale or for gifts, but for me it's safety pins until it's been years and I decide it's potentially embarrassing to still have it pinned on. Shhh... don't tell. I love it anyway!


Saturday, 9 January 2016

Gwen Stephani Would Want One...


Huh? Explanation - I have a friend who has seen a lot of my makes and apparently commented to another friend that I am cool like Gwen Stefani.... when this other friend relayed this info to me, I laughed. I mean, that's quite a compliment to have one's coolness compared to the coolness of Gwen Stefani, but I laughed because I don't see it. I am Sooooooo not that cool! If asked who I think I am like, it would be Liz Lemon. Actually, I have had a few people tell me I remind them of Liz Lemon, which I also take as a huge compliment because I like Liz Lemon. A lot. We share an affinity for night cheese. But back to Gwen Stefani... I made these hoodies right before a street festival in which I had a booth (the Hootenanny on Hunter Street) and I needed to make tags for them. So after the fabric content and before the washing instructions I wrote that Gwen Stefani would want one, and obviously I would know what she would want because we share a coolness level, right? Exactly.

This was a first foray into Frankensteining such obviously different fabrics into a top.

Example 1 - purse made from cord, wool tweed, and vintage linens

I mix fabrics all the time in purses but this was a little intimidating. especially using some fabrics that stretch and some that don't, and could possibly shrink!


Let me introduce my best friend


I love this thing!  It lets me sew different fabrics together like a dream!

So anyway, I have been making these hoodies. The top one is a prototype and the one I wear. But I have since sold a few, including this guy:


It's my design, but it was easy to do, if not a bit time consuming. I have a basic pull-over jersey pattern I made that I based this off of. I started by making the front panel with wool tweed fabrics, and pieced around it. After making a few I realized that I should make a pattern that would be easier to re-create. I also want to host a few sewing friends for a sew-a-long and I realized that my non-pattern method would not be easy to follow. I may head in the pattern-making direction, but not sure. I do love creating, and tire of making the exact same things over and over.... If anyone reading this wants more details, just let me know! I'd be happy to share tips and techniques! 


Thursday, 7 January 2016

So Apparently I Have a Fall/Winter Collection...

Sewing is fun! Wheeeeee!!!
This past fall I was asked to participate in the local University's Fashion show - not as a model (hahahaha!) but as a designer. I was pretty excited, I mean, I know I can sew, and I know I can make wearable clothing that holds together, but I always have a problem calling myself a designer. Maybe because I am mostly self-taught? I don't know. Anyway, they asked and I said yes! The only problem is that I make clothing pieces one-at-a-time and often with no exact size in mind, and when I go to craft shows it is often with one piece of that design in that size. Now I was going to have to make clothing to fit the models with not much advance notice. Also, I strive to have a day-time job as well (although in this fall there was Work Unrest and I am not working much which actually worked well for this fashion show, if not for my bank account).


I laugh in the face of minimal work!

The unofficial title of my collection is 15 Days. That's the amount of time I had to work on the outfits after I got the measurements and got a few Very Important Job Interviews out of the way (I did get one of the jobs - yay me!)

I whipped up one skirt right away, and I pulled two hoodies/jackets from my existing stuff so I had three half outfits - did I mention I needed to provide a minimum of ten outfits?  I didn't? 10 outfits. 10. That's a lot, but I do love a challenge!


Yes, that is kale in the front pocket. No, the Kale was not in the fashion show outfit.
I quickly realized that dresses were the way to go.  So I started a new idea that was continuing with a new favourite of mine - mixing wool and jersey. I know, sounds odd, and most people don't like mixing different fabrics like that, but I love texture and I love wool and the stretchiness of jersey, and so here we are! Notice the hoodies above - love them!

The dress - near completion
So this dress was built!  I painstakingly made it symmetrical. I love symmetry. I mean, I don't sit down and say, "Let's make this thing symmetrical" but it just happens. But symmetry takes time, especially when you are not using a pattern and your method involves laying everything down, cutting pieces, laying them out, and eyeballing it each. and. every. time! Although I love the look, I admit to recognizing the need to bring asymmetry into my life a bit more. New Year's Resolution #1 I think!

Progress shot

This dress will also be featured in Trent University Fashion Show's magazine they are putting out. I am not sure when that is happening, but I think that's pretty cool!

I *was* going to put all the clothes from the fashion show in my etsy shop, but as I was making this beauty I knew I was going to keep it. I need to advertise my skillz, yo!

I want to post about other pieces I made, but I will do separate posts, maybe some tutorials?  I haven't done a tutorial before. Surely this old dog can learn some new tricks, along with continuing to call you Shirley :)


Friday, 25 December 2015

Back at it...Again...

Life has a way of derailing your projects, doesn't it?  Not necessarily in bad ways, just distracting ways. Noisy ways. Ways that make you want to tape together toilet paper rolls and make cardboard houses and such instead of typing at your laptop. You know. Normal stuff!


So it begins again. Like a new movie in a series, except nobody is lining up for this blog post (but if they did, what costumes would they be wearing?)


Tuesday, 28 October 2014

D is for Droid..

..our most favourite one,
Breaking it open
Was oh, so much fun!


Birthdays = pinatas around here. Actually, we will take any opportunity to make a paper mache object, fill it with candy, decorate, and then break it open for the candy!  I do most of the work - heaven  forbid any childrens get their hands mucky with the flour paste, but it is usually their idea and they help decorate.

This time the request was for R2-D2.

I love Star Wars, but I also love sphere-based pinatas.  So simple and easy!  I always have a ton of balloons around.  But a non-sphere pinata?  I was a little apprehensive, but I love a challenge!


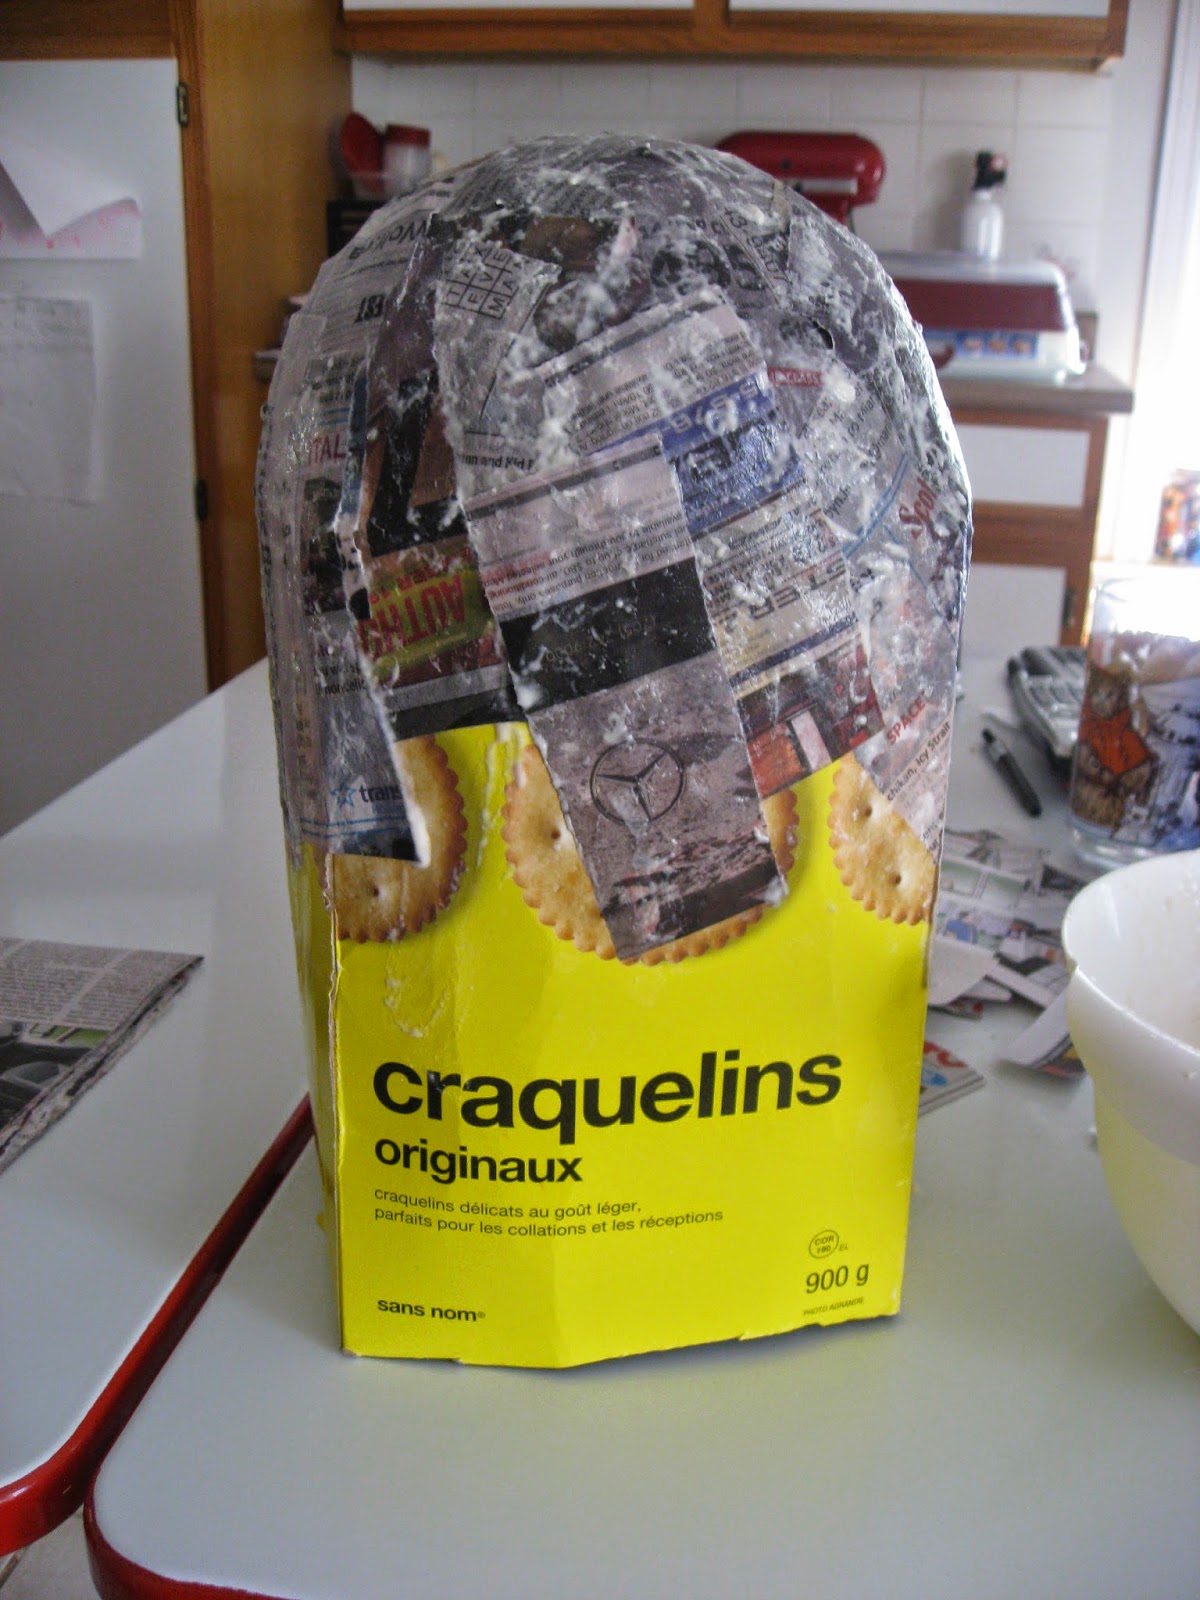
It was actually pretty easy!  It did start with a balloon (of course) and a club pack cracker box.  I rounded the box and taped it to the balloon.  Then it was paper mache time.  I did add a layer on top of the whole cracker box, just to help the box keep a round shape instead of staying rectangular.


I let it dry by placing it outside (time crunch - the breaking was to be the next day) and set the open-end box over a round bowl to help the round shape set. Warning - If you are doing a pinata that is just using a balloon, beware when putting it outside to dry in the heat - the balloon will expand and can break through the lovely paper mache you have just spent all that time pasting!

Quick dry outside


I made some simple "legs" too by rolling up newspaper and taping it into the desired droidy shape, and then a quick paper mache over to cover the folds.

leg pic before the mache


I added the legs by punching holes in the droid body and the legs, using popsicle sticks and duct tape to join them together.  It is not my best work, but I just needed it to look decent and stay together until it got smashed apart.


Paint it white, then add some very quick details.  Try to make it wonky.  Adds to the homemade look.

Hot glue a white paper plate to the bottom after putting candy and some small pieces of tissue paper for extra fun.  Trim excess paper plate away.

Et voila!

Same pic as above - amateur blogger here!

Turns out that flour paste is surprisingly strong and the pinata broke where the paper plate was hot glued to the bottom, so we have an excellent condition droid to hang up somewhere!   Hurray for flour paste in all its mega-strong glory!  If I had known if would not break very easily I would have taken a bit more time decorating it!

Stay tuned for more Star Wars crafting...