Tuesday, 28 October 2014

D is for Droid..

..our most favourite one,
Breaking it open
Was oh, so much fun!


Birthdays = pinatas around here. Actually, we will take any opportunity to make a paper mache object, fill it with candy, decorate, and then break it open for the candy!  I do most of the work - heaven  forbid any childrens get their hands mucky with the flour paste, but it is usually their idea and they help decorate.

This time the request was for R2-D2.

I love Star Wars, but I also love sphere-based pinatas.  So simple and easy!  I always have a ton of balloons around.  But a non-sphere pinata?  I was a little apprehensive, but I love a challenge!


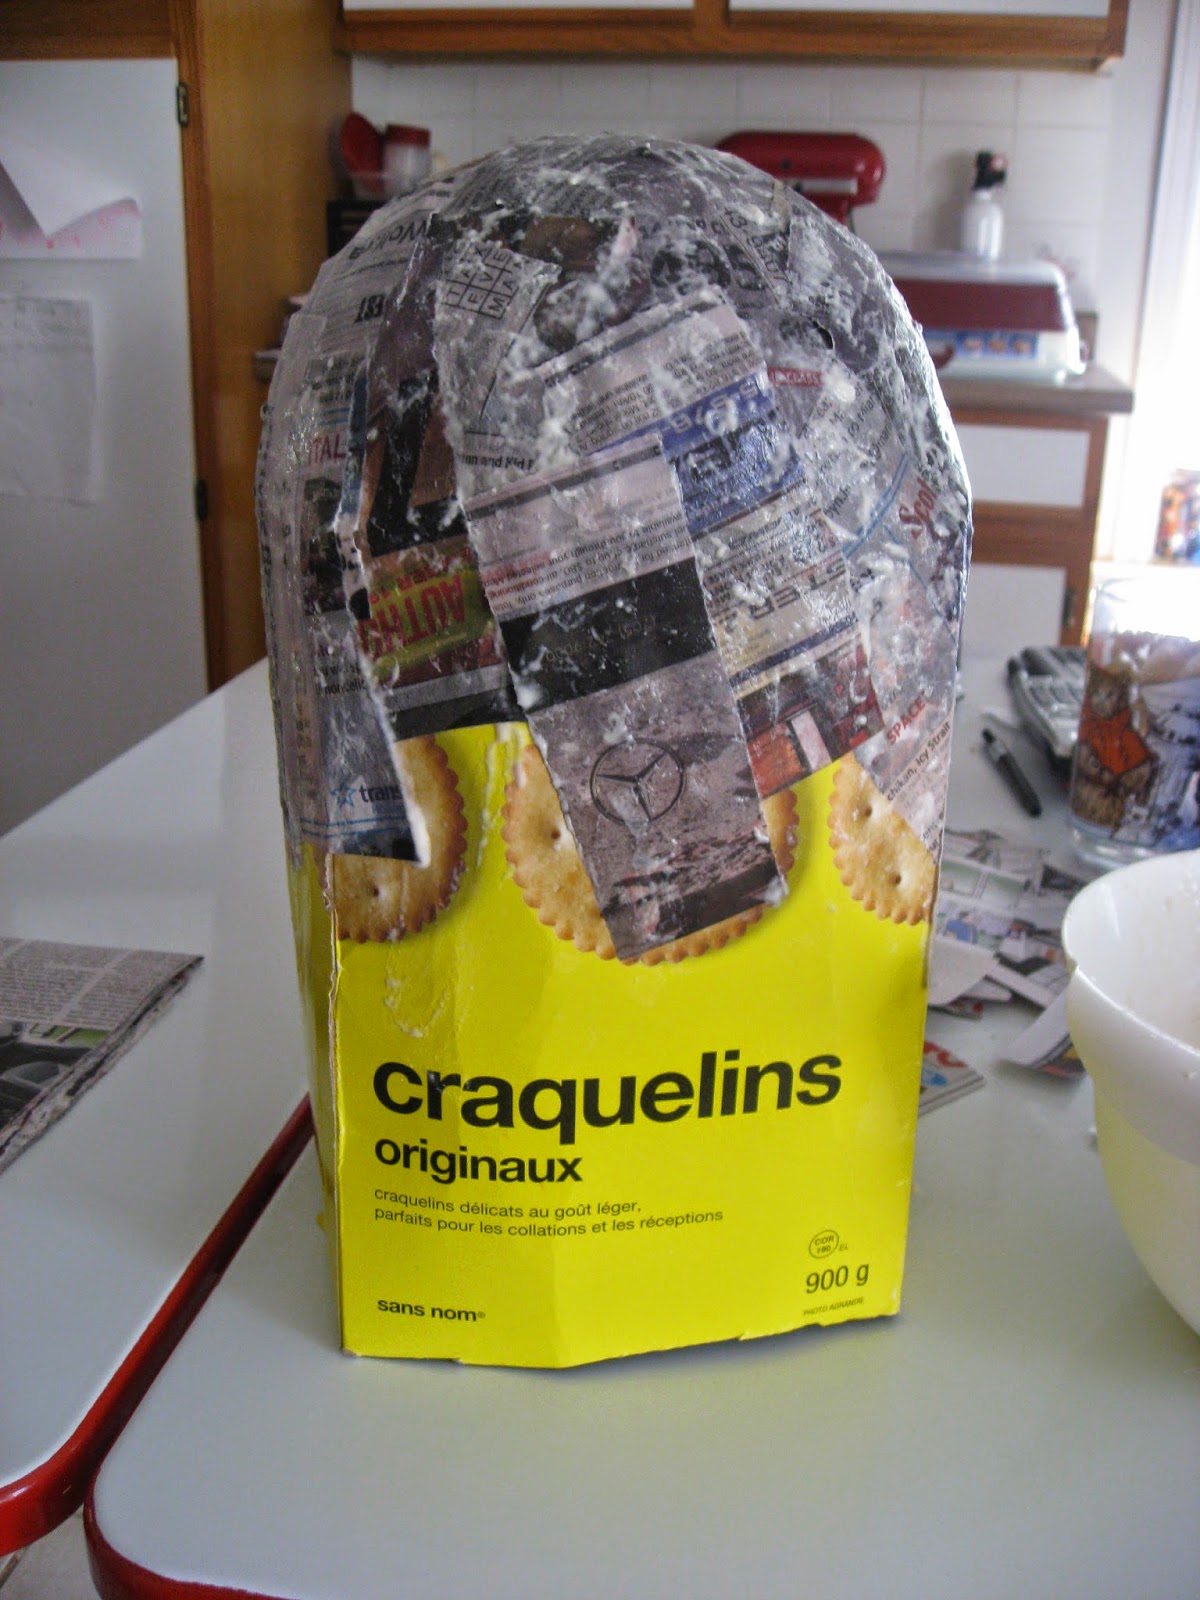
It was actually pretty easy!  It did start with a balloon (of course) and a club pack cracker box.  I rounded the box and taped it to the balloon.  Then it was paper mache time.  I did add a layer on top of the whole cracker box, just to help the box keep a round shape instead of staying rectangular.


I let it dry by placing it outside (time crunch - the breaking was to be the next day) and set the open-end box over a round bowl to help the round shape set. Warning - If you are doing a pinata that is just using a balloon, beware when putting it outside to dry in the heat - the balloon will expand and can break through the lovely paper mache you have just spent all that time pasting!

Quick dry outside


I made some simple "legs" too by rolling up newspaper and taping it into the desired droidy shape, and then a quick paper mache over to cover the folds.

leg pic before the mache


I added the legs by punching holes in the droid body and the legs, using popsicle sticks and duct tape to join them together.  It is not my best work, but I just needed it to look decent and stay together until it got smashed apart.


Paint it white, then add some very quick details.  Try to make it wonky.  Adds to the homemade look.

Hot glue a white paper plate to the bottom after putting candy and some small pieces of tissue paper for extra fun.  Trim excess paper plate away.

Et voila!

Same pic as above - amateur blogger here!

Turns out that flour paste is surprisingly strong and the pinata broke where the paper plate was hot glued to the bottom, so we have an excellent condition droid to hang up somewhere!   Hurray for flour paste in all its mega-strong glory!  If I had known if would not break very easily I would have taken a bit more time decorating it!

Stay tuned for more Star Wars crafting...

Wednesday, 1 October 2014

C is for Control panel...

..of a large rocket ship.
It has levers and buttons
that bloop, bleep, and blip!


Control panel the first

All last fall and winter these childrens and I dreamed about decorating their room.  Inspired by our favourite band which appeals to children and adults, They Might Be Giants, we really had no choice but to choose space.  The band has an album called "Here Comes Science" and when I saw it at my local library a little over a year ago, I did not know how much it would influence us!  My childrens  loved the song and video about the solar system, and that was our inspiration.
Video for youtube particle men planets
Video link over here---


https://www.youtube.com/watch?v=XI5nBUidKqo


They love Jupiter!  Anyway, this added to the sciencey love that my daughter already has for Earth, and we did their room as the Solar System. (pictures at a later post)  So as part of the space bedroom, their beds needed to be rocket ships of course!

Enter some large cardboard I had, some paint, small boxes and aluminum foil (Side note - we lurve aluminum foil and all the wonderful crafty things you can do with it! Wait, what?  It's meant for kitchen use?)

To make the aluminum foil controls, I just covered a box (cereal or similar) with foil.  The levers are made by first making a small ball of foil.  I put this on top of/above a small rectangle of cardboard.  Then I took a large piece of foil and covered the whole thing, so it would stay together.  Slice a straight-ish line into your foil covered box and insert lever.  Repeat!  Glue gun the foil box to the cardboard.

And here we are:
Control panel the second

Close-up of working levers
And they are *finally* up on their walls by the beds!  That was actually a challenge since the paint warped the cardboard so I couldn't tape them up.  I ended up punching holes in the top and bottom sides and used those sticky wall hook things.  Seems to work well!

*Note - I realize this is the second time I am posting about a life/craft project that is inspired by They Might Be Giants (and it likely won't be the last).  I am not affiliated with them in any way, we just really like them and their amazing science, math, and letter songs!  They inspire my kids to learn and that is super cool! Thanks TMBG!